Elopements, MERGE, Wedding Planning, Weddings

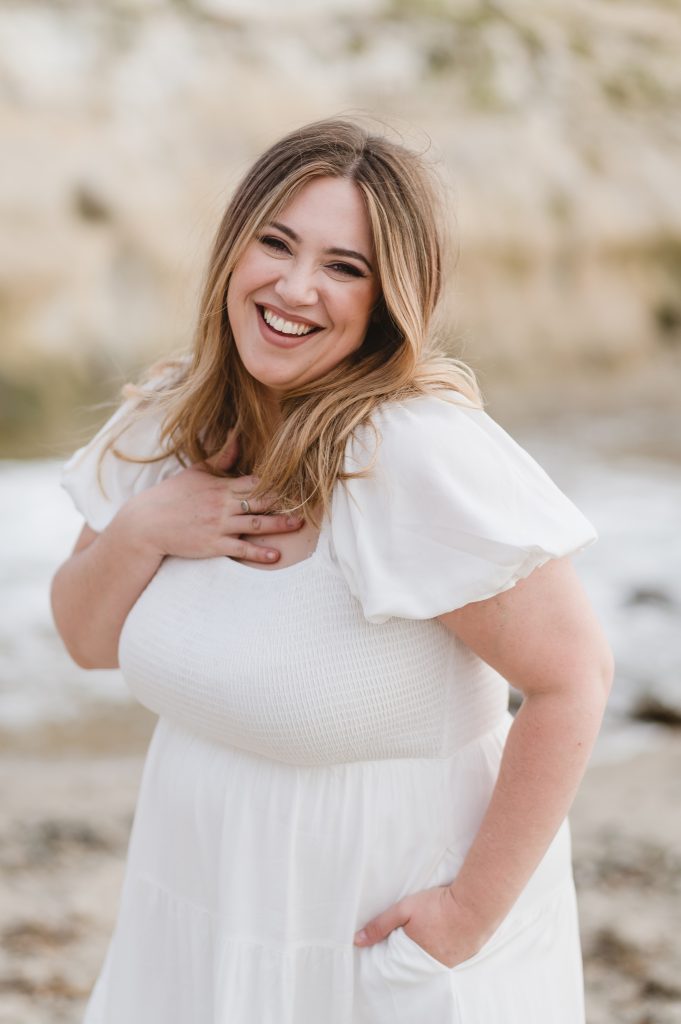
South Lake Tahoe Elopement
I had an absolute blast photographing this South Lake Tahoe Elopement Styled Shoot. I went with Susan of Jireh Artistry and Angela of Perfectly Bubbly Events who also doubled as the bride in this shoot.
We chose this area because we wanted the expansive views that most couples want when they elope in Lake Taoe. Lake Tahoe is such a beautiful pristine location to elope.
South Lake Tahoe
Lake Tahoe has two main areas where you can find beautiful and scenic wedding venues or elopement areas. Both areas are exceptionally pretty with alpine-style ski areas and charming towns.
South Shore is packed with luxury hotels and resorts, so it could be more active with tourists and thus take longer to drive places.
North Shore feels more secluded and pristine and much less crowded even during peak seasons.
When choosing a location for your event, look for venues that satisfy your criteria in terms of ambiance, food, accommodation, and services. Because you can easily boat between the two shores, you can even book a venue on one side of the lake and do a photoshoot on another, but you need to ensure you give appropriate time to travel between both. Don’t rely on GPS for planning purposes because it can suddenly get busy.
Eloping in Tahoe
If you are eloping in Lake Tahoe, be sure that you read all the regulations and tips that I have compiled here. It will help you to better plan and be able to enjoy your moment.
Looking for a Photographer for Lake Tahoe
Look no further, I absolutely love Lake Tahoe and really enjoy helping couples navigate where and how to elope there. You can contact me here.
Branding, MERGE
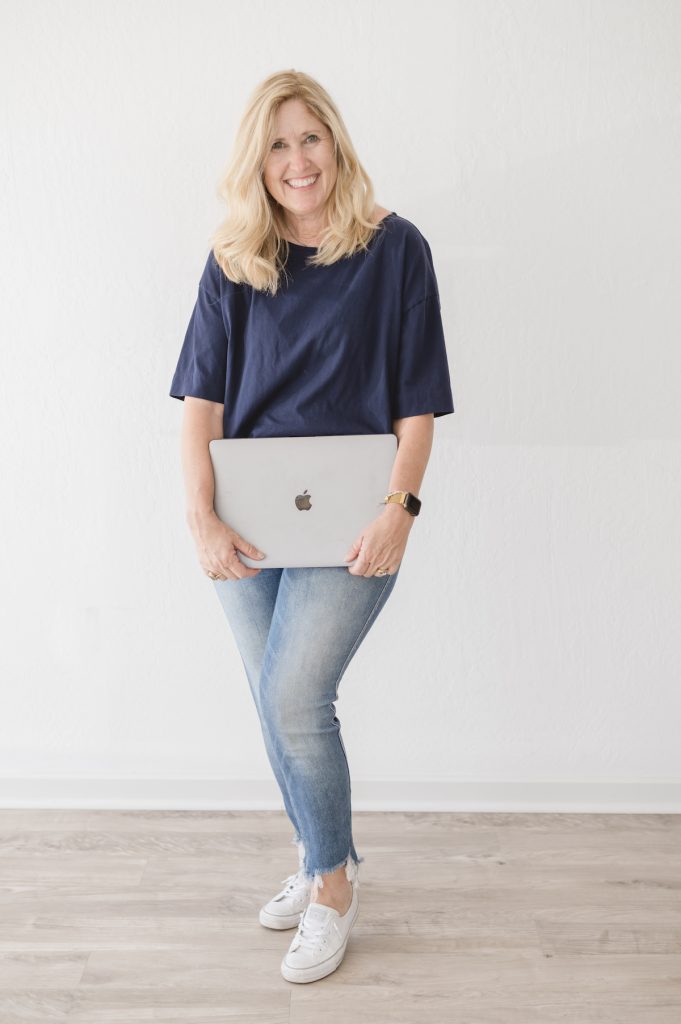
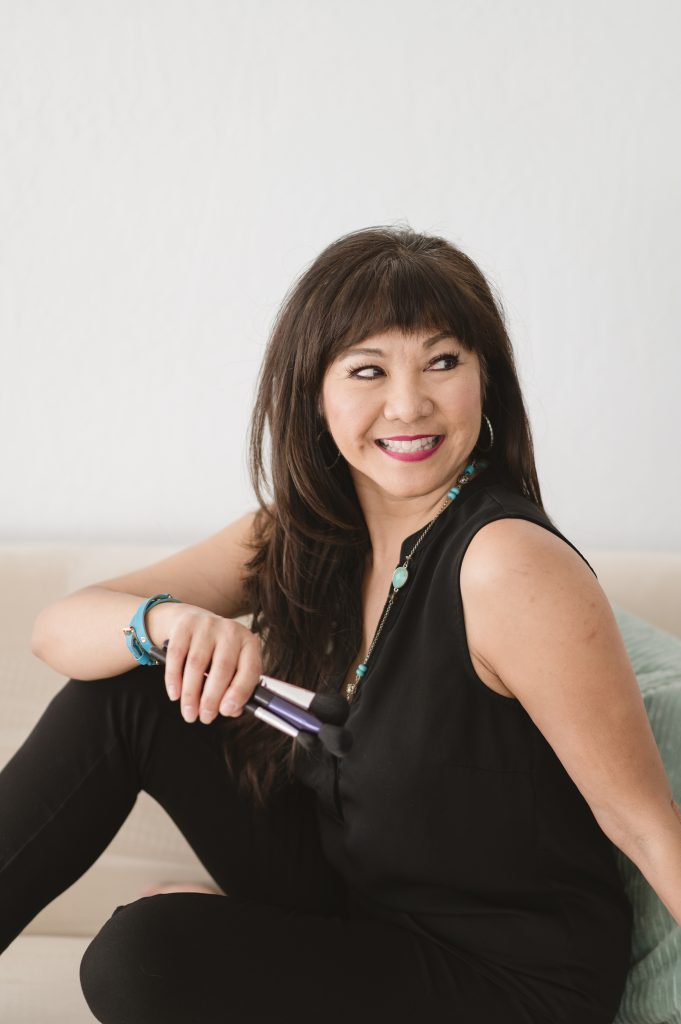
I’m gonna start by being honest and sharing that I HATE being in front of the camera. Yes, that’s right. I’d prefer to be behind the camera making people look amazing than stepping in front of that camera. So from one NON-supermodel business owner to another, I can assure you that it’s doable, not as scary or awkward as you think, and totally worth it!
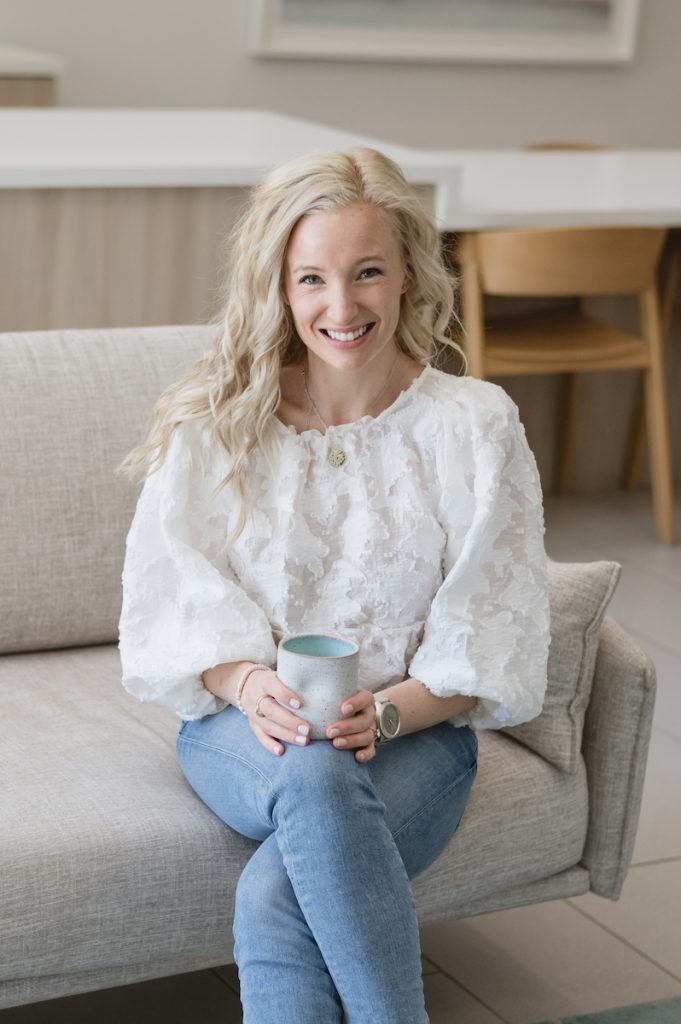
When you and/or your team can be seen throughout your marketing, potential clients will be able to see who they would be working with, get a glimpse into the process, and imagine themselves being a part of that experience.
It’s undeniable that photos of the business owner on social media do WAY better with engagement than any other images. If I haven’t convinced you yet, I have a list of reasons why you should work with a Brand Photography expert (like myself).
So let’s get started:
BRAND COHESION
Professional brand photos help immensely with brand cohesion. You don’t have to only share professional images on your social media, but utilizing professional images of you, in particular, helps to have a theme and brand voice throughout your feed. My advice is to post at least one image of YOU every 6-9 images on your feed to ensure that you are the face of your brand people get to “know, like, and trust”. You can utilize images of yourself or the tools of how you run your business (laptop, cell phone, a person you are talking to) to help a potential client on social media know immediately who you are and how you help.
CONSISTENCY + CONTINUITY
Consistency and continuity help your followers or potential clients know to depend on you showing up and advice. As the images are all taken by the same photographer, your feed images will all have the same look and feel. It can harm your professionalism and the look and feel of your Instagram account if you post a selfie or blurry or bad light photo one day and a professional image the next day. Your customers will get lost and it can feel that you aren’t consistent with your presence or look which can give them hesitation in working with you.
MAKES YOU MORE RELATABLE
Professional images make you more relatable! First the stats: 82% of consumers trust a company more and 77% are more likely to buy something If the business owner uses social media. This isn’t to say that these photos are just for your social media profiles, or that they should all include you, but to point out that people want to connect with other people, relate to others, and see the face behind the company.
When a professional photographer takes your brand photos, they will get you a ton of different looks you may not think about to express what you do and who you are.
CREDIBILITY + CONFIDENCE
Professional images lift your presence as one to be taken seriously and help to build credibility and confidence. It’s also a way to boost your self-confidence. Sometimes all business owners can have that “impostor syndrome” feeling. With professional images that you love, you tend to feel really confident in presenting your advice and services. Working with a professional photographer can help with posing and knowing which photos work for business professionals on social media. This is what they do day in and day out.. All of that helps to build credibility and confidence.
TIME-SAVING
Having a custom gallery of images that represent your brand and company makes it easy when posting to social media. All you have to do is go to the gallery and pick an image that represents what you want to share on social media. Trying to take your own photos takes time, can be frustrating, and tends to look inconsistent. The money spent on a photographer will ultimately free you up to work in your genius zone and bring in more clients.
PROFESSIONAL ADVICE
Professional advice on organizing and figuring out the images you need is invaluable. Chances are, the photographer if they specialize in branding photos has worked with another business owner and knows which images work on social media. They can help you choose the scenes/clothing/poses that will be most successful to get engagement on social media, help you curate the type of images you want or need to most effectively sell your service or product, and help to do all of that in an incredibly fast way that saves you time.
BOTTOM LINE
Whether you work with me or another branding photographer, typically a one-hour shoot will net you enough images to post for 3-6 months depending upon how frequently you post.
The old saying, “A picture is worth a thousand words,” is true.
I have a number of ways we can work together from monthly Social Sessions to the typical one-hour session and a 1/2 day session. Wanna chat to see which session is right for you?
Don’t Forget To Pin It!